REVIEW · VENICE
Venice Photography Masterclass – Private Photography Lesson
Book on Viator →Operated by Aperture Tours · Bookable on Viator
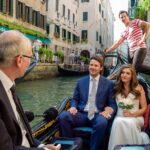
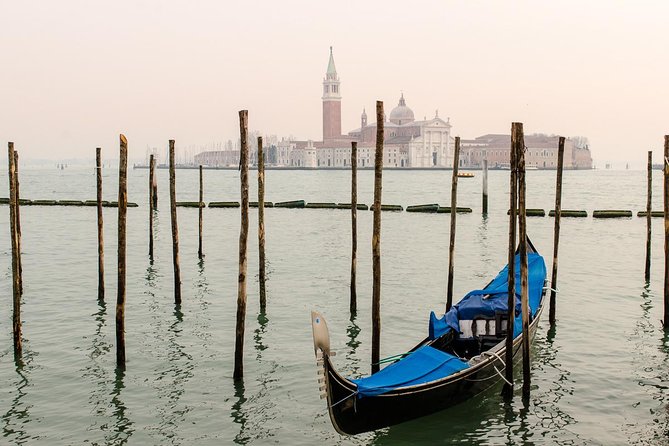
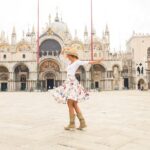
Venice at night looks like a dream you can photograph. This private photography lesson guides you through Venice’s key sights and teaches the camera skills that make those shots repeatable.
I especially like how the session mixes classic landmarks with practical instruction, so you’re not just pointing your camera. You’ll get hands-on guidance on settings like aperture, shutter speed, and ISO, plus practice across daylight, sunset, and evening.
One thing to consider: you’re out walking for about 3 hours, and Venice weather can change fast—so you’ll want to dress for rain and wind even if the plan stays the same.
In This Review
- Key things that make this masterclass worth your time
- A private Venice photo lesson that focuses on real results
- Small-group coaching (and why it helps your photos)
- The camera settings you’ll use on day one
- Piazza San Marco: where to shoot St Mark’s Square with confidence
- The City of Venice stop: getting beyond the obvious shots
- Ponte di Rialto: getting the lines right on a famous bridge
- Ponte dell’Accademia: a bridge stop that feels a little more “photo”
- Campanile di San Marco: shooting the tower area as the light changes
- Sunset practice: turning Venice into twilight photos
- Grand Canal at night: light streaks and long exposure techniques
- What to bring (so you don’t lose shooting time)
- Price and value: is $204.25 a good deal for Venice photos?
- Who this Venice masterclass is perfect for
- Should you book this Venice Photography Masterclass?
- FAQ
- How long is the Venice Photography Masterclass?
- Is this a private lesson or a group photo tour?
- What language is the tour offered in?
- What kinds of photography will we practice?
- Will we photograph Rialto Bridge and St Mark’s area?
- Where do we meet, and where does the tour end?
- Is transportation or hotel pickup included?
- Does the tour run in bad weather?
- Is there an access fee for some visitors?
- Can I get a refund if my plans change?
Key things that make this masterclass worth your time
- Private, max 4 people: more personal coaching than you’ll get in a big group photo walk
- Landmarks + strategy: learn how to frame Rialto and St Mark’s, not just where to stand
- Light-by-light practice: daylight, sunset, and night shooting techniques in one session
- Night photography tools and methods: long exposure ideas like light streaking/light painting come into play
- You can steer the route: the itinerary is tailor-made to what you want to shoot
A private Venice photo lesson that focuses on real results
If you’re the kind of person who buys a guidebook, takes a few photos, then wonders why they look flat—this is the lesson style that helps. It’s built around how to shoot, not just where to go. That difference matters in a city like Venice, where lighting changes quickly and the “perfect postcard spot” is only part of the story.
You’ll also feel the pacing is made for learning. Instead of racing from viewpoint to viewpoint, you get short, focused stops—then you practice the camera settings as you go. The fact that you can customize your interests helps too, because not everyone wants the same angle of Rialto or the same mood at twilight.
You can also read our reviews of more private tours in Venice
Small-group coaching (and why it helps your photos)
This is private, with a maximum of 4 people per booking. That’s not a trivia detail—it’s the reason you can ask questions and get answers that actually match your camera. In one experience, the student had one-on-one time with Marco, which is the kind of attention you only get when the group is tiny.
You’ll be working with both a local guide and a professional photographer guide. The local guide keeps the walking route sensible and helps you find the good spots. The photographer guide is the one who will help you dial in settings and composition so your images look intentional, not accidental.
Also, the masterclass is offered in English, and it operates in all weather. So plan on flexibility, not perfection weather.
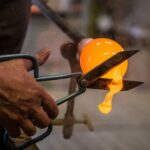
The camera settings you’ll use on day one
Venice is one of those places where your camera can betray you. Bright stone in the sun. Reflections on water. Dark facades at night. Confusing in-between light at sunset.
This lesson walks you through setting the basics: aperture, shutter speed, and ISO. You’ll learn what each setting does and then apply it where it matters—on landmarks you’ll recognize instantly. You’ll also practice thinking in terms of light conditions, not just settings names.
One student found this especially useful because they’d upgraded cameras and then let it sit in a drawer for years. The session helped them get unstuck fast and start using the camera consistently right after the lesson.
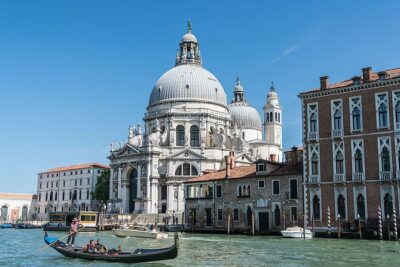
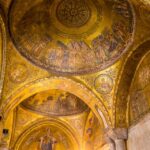
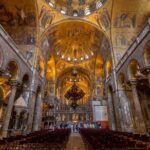
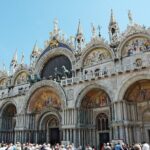
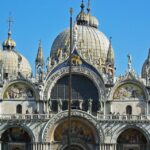
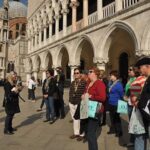
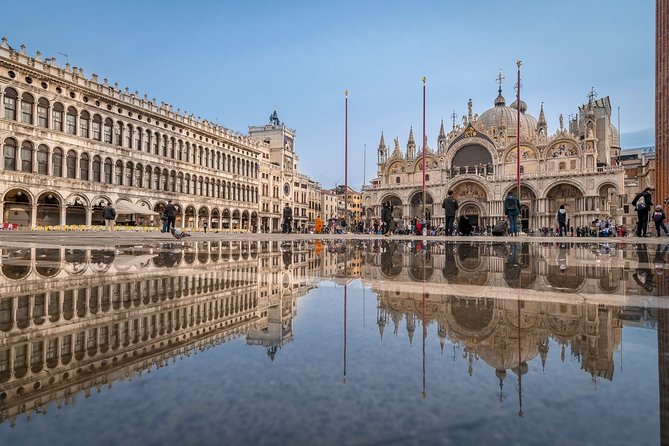
Piazza San Marco: where to shoot St Mark’s Square with confidence
Stop 1 focuses on Piazza San Marco and the surrounding area, with about 30 minutes for photography. This is the part of Venice most people dream about, and it’s also the part where it’s easy to fall into one of two traps: shooting only the widest view, or getting overwhelmed by too many iconic shapes at once.
Here’s what I think this stop is doing well: it gives you a base of viewpoints early, then you can learn how to control your camera before the light gets trickier. If you want St Mark’s Basilica in your photos, this is where your guide will likely help you find workable angles around the square.
Possible drawback: this area can be busy and the “best view” can depend on timing and crowd flow. Because you’re with a small group and a guide, you’re not stuck waiting blindly—you can adjust your framing.
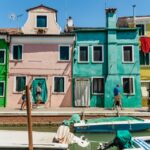
The City of Venice stop: getting beyond the obvious shots
Stop 2 is listed as City of Venice with another 30 minutes of photography. That sounds vague until you connect it to what makes Venice feel real. In at least one case, the lesson included areas where locals live—so photos weren’t only about big monuments.
This portion is where you can train your eye for small scenes: doorways, canals glimpsed between buildings, everyday movement, and the angles that make Venice feel lived-in. It’s also the part where you can test composition ideas without always relying on the same skyline view.
If you’re only interested in the biggest landmarks, you might find this stop less exciting. But if you want your photo set to look like more than a highlights reel, this is often the most rewarding slice.
You can also read our reviews of more photography tours in Venice

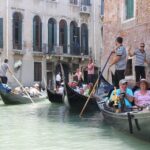
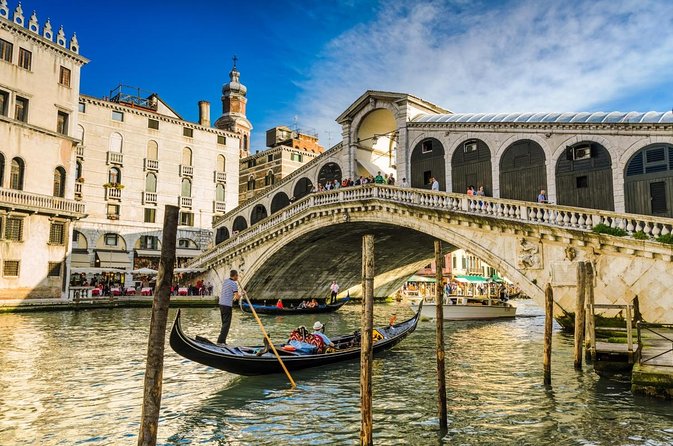
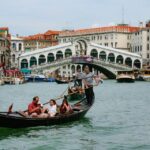
Ponte di Rialto: getting the lines right on a famous bridge
Stop 3 is Ponte di Rialto, again with about 30 minutes. Rialto is a photography classic for a reason: strong geometry, dramatic views up and down the canal, and reflections that can make the composition look twice as good.
But it’s also one of those places where you need a plan. Otherwise you take the same tourist shot everybody else does and move on. In a masterclass like this, you should use Rialto to practice the basics: what shutter speed does to water reflections, how ISO changes noise when light drops, and how aperture affects your depth of field when buildings get close.
Drawback to know: because Rialto is famous, you’ll want to stay flexible with viewpoint. Your guide will help you shift framing so you can still get usable shots without getting locked into one spot.
Ponte dell’Accademia: a bridge stop that feels a little more “photo”
Stop 4 is Ponte dell’Accademia, with 30 minutes for photography. This is a smart pairing with Rialto because it changes the feel of your images. You get different lines, different sightlines, and a more varied composition set even within the same general canal zone.
This is also a good moment to test your learning. You’ve already been taught how to set camera settings and how to think about light in Venice. Now you get to apply it immediately, instead of saving your practice for later.
If you love building a sequence of images (wide to tighter, day to twilight), this bridge stop can give you that middle chapter: still iconic, but not only about one single monument.
Campanile di San Marco: shooting the tower area as the light changes

Stop 5 focuses on Campanile di San Marco with another 30 minutes. The tower area can be tricky because you’re balancing detail—stone textures, edges, and architectural lines—against a sky that may shift as clouds move in.
What I like about pairing this stop after bridges is the way it changes your subject. Bridges often demand clean lines and water reflection control. A tower demands attention to verticals, perspective, and keeping the subject from looking distorted. A guide can help you choose angles that keep the architecture looking correct and attractive in your frame.
Potential drawback: if you’re using a wide lens, the temptation is to include too much. With a tower, that can turn into “everything is in the shot” instead of “the subject is the subject.”
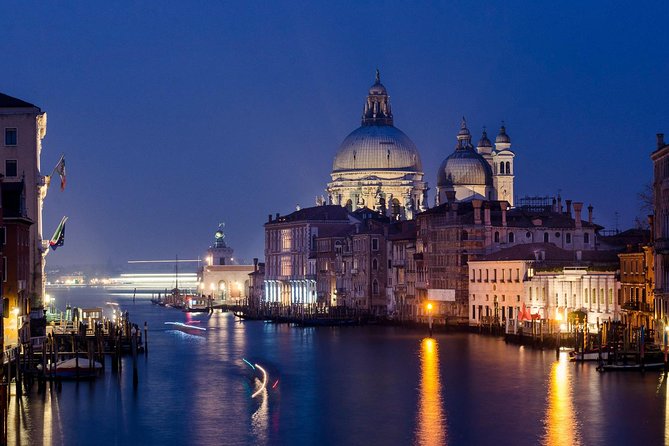
Sunset practice: turning Venice into twilight photos
After the core sightseeing stops, the lesson moves toward sunset and twilight-hour photography. This is where your camera settings start to pay off in a very practical way. You’ll want to understand how quickly Venice darkens, and how reflections on water can become either your best friend or a reason your shots get muddy.
Expect to experiment with creative angles, focal points, and composition. The goal isn’t just to capture the sunset as a pretty background. It’s to frame Venice in a way that uses the changing light to create atmosphere.
If you’re a beginner, this is a great time to ask “what should I change first?” Because night photography can feel intimidating, but twilight is the stepping stone that makes night settings feel less scary.
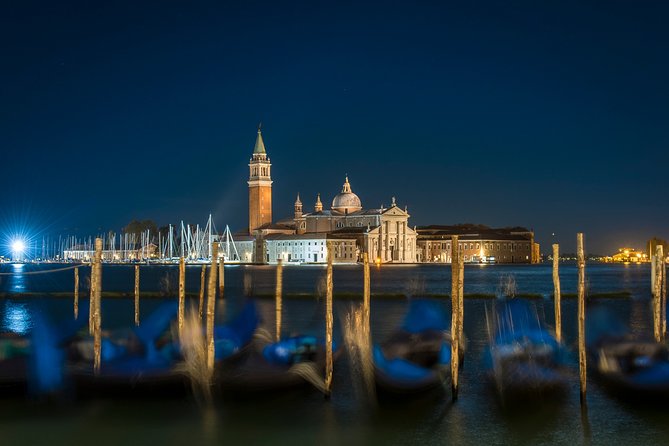
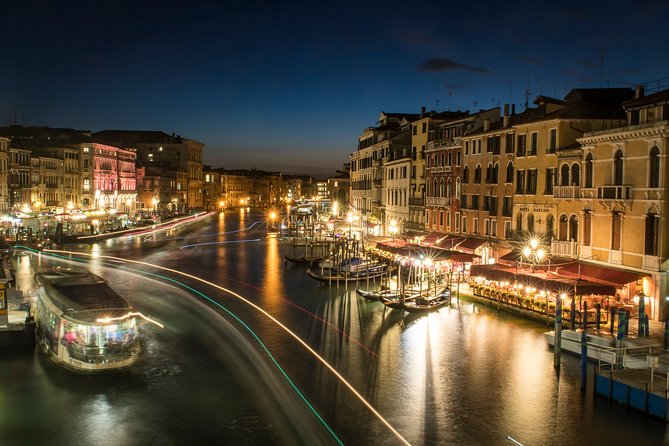
Grand Canal at night: light streaks and long exposure techniques
The final phase focuses on night photography along the Grand Canal. This is where you’ll try techniques like light painting and long exposure light streaking (using moving light sources to draw lines in your exposure).
Long exposures are where the earlier lessons on shutter speed and ISO become real. If you set things wrong, you either get a bright, washed image or a dark one where Venice loses its glow. The coaching helps you correct that fast.
In one class, Marco taught how to shoot night photos in Manual versus AV, and how to coordinate the camera timer with manual settings. That kind of practical instruction matters more than you’d think, especially if you don’t want blurry frames caused by touching the camera at the wrong moment.
Also worth knowing: one student’s tripod wasn’t available, so Marco used his Fotopod miniature tripod with a DSLR. If you have a tripod, bring it. If you don’t, don’t panic—you can still learn the fundamentals, and you might get guidance on workable options.
What to bring (so you don’t lose shooting time)
You don’t need fancy gear to learn the camera skills—but you do need to be ready to shoot. Here’s my quick checklist.
Bring your camera and any essential accessories you rely on day-to-day. Wear shoes you can walk in for about three hours on Venetian streets. If you have a tripod, consider bringing it for night work and long exposures. One student used a miniature tripod solution during the class when their gear wasn’t available, which is a good reminder that night photography often wants steadiness.
Finally: if your camera is sensitive to settings changes, this is a good time to plan around that. During the lesson, you’ll be adjusting aperture/shutter/ISO across different light conditions, so be ready to experiment instead of hunting for one perfect setting.
Price and value: is $204.25 a good deal for Venice photos?
At $204.25 per person, this isn’t a casual add-on. But you’re paying for two things most photo tours skip: hands-on instruction and a private setup capped at 4 people.
You’re not only going to famous spots—you’re learning the camera controls that help you repeat the results later. That’s the kind of value that carries through your whole trip. One beginner-level student said they used what they learned almost every day afterward, which is exactly what you want from a paid lesson: skills, not just souvenir pictures.
Also, the stops themselves list free admission for each viewpoint area. That doesn’t mean you won’t feel the cost in time (you will walk), but it helps you avoid surprise entry fees tied to the locations.
One possible cost wrinkle: if you’re staying outside Venice and doing the day visit, you may need to pay a €5 access fee on certain dates. The specifics depend on when you go, so it’s smart to check before you arrive.
Who this Venice masterclass is perfect for
This works especially well if you:
- Want beginner-friendly coaching that gets you using manual settings with confidence
- Prefer small-group attention rather than a generic walking tour vibe
- Love classic Venice but also want shots that feel grounded, not only postcard-perfect
- Want a guided plan for daylight, sunset, and night photography in one go
It may be less ideal if you’re looking for a purely sightseeing-focused experience with no interest in camera settings. You’ll learn and practice, so it’s not a passive tour.
Should you book this Venice Photography Masterclass?
If your camera skills feel rusty, or you want a structured way to turn what you see into what you photograph, I’d book it. The mix of stops—Piazza San Marco, Rialto, Ponte dell’Accademia, and Campanile area—plus the progression into sunset and Grand Canal night photography is a smart learning arc.
I also like that the class can adapt to your interests, because Venice photography can go several directions: architecture, street moments, reflections, or night glow. With only up to 4 people, you’re more likely to leave with settings you understand and angles you can recreate later.
Just go in with realistic expectations: this is a walking lesson, and you should dress for weather. If you do that, you’ll get a lot more than landmark photos—you’ll get a working method.
FAQ
How long is the Venice Photography Masterclass?
It lasts about 3 hours (approx.).
Is this a private lesson or a group photo tour?
It is private. Only your group participates, with a maximum of 4 people per booking.
What language is the tour offered in?
The lesson is offered in English.
What kinds of photography will we practice?
You’ll practice photography in daylight, at sunset/twilight, and at night. You’ll also learn night techniques such as light painting and long exposure light streaking.
Will we photograph Rialto Bridge and St Mark’s area?
Yes. The experience specifically highlights capturing the Rialto Bridge and St Mark’s Basilica, and the route includes stops around Piazza San Marco and Campanile di San Marco.
Where do we meet, and where does the tour end?
You meet at Campo San Vidal (Campo S. Vidal, 30124 Venezia VE, Italy). The activity ends back at the meeting point.
Is transportation or hotel pickup included?
No. Transportation to/from attractions and hotel pickup/drop-off are not included.
Does the tour run in bad weather?
Yes. It operates in all weather conditions, so you should dress appropriately.
Is there an access fee for some visitors?
On certain dates, day visitors who are staying outside Venice may have to pay a €5 access fee. Details and exemptions are listed at https://cda.ve.it.
Can I get a refund if my plans change?
Yes, free cancellation is available. You can cancel up to 24 hours in advance for a full refund.
If you tell me what camera you’re using (and whether you have a tripod), I can suggest a simple approach for setting expectations before you go.