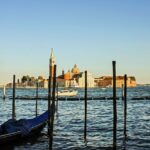
Golden hour in Venice, guided by your phone. This private workshop puts you at Piazza San Marco when it’s calm, not packed, and gives in-the-moment coaching so your photos look intentional (not accidental). I like the focus on practical skills like using golden light, long shadows, and reflections, plus helping you frame Venice’s big shapes into a story. The main drawback: in just about 1 hour 5 minutes, the session centers on this one area, so you’re not doing a whole-city walking tour.
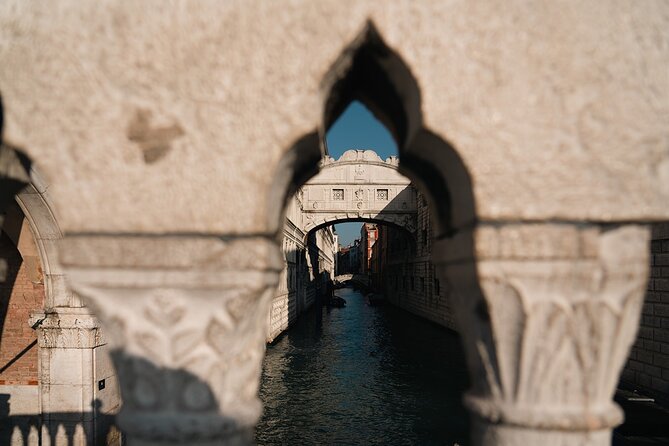
You’ll start with a pro’s eye for composition—St. Mark’s Basilica, elegant arcades, and the stone surfaces where light and water play together. If you’re newer to phone photography, this is a friendly way to learn without fiddling for hours. The private setup also means you can ask questions as you go, instead of being rushed with a group.
This is for you if you want better photos fast and you enjoy wandering with purpose. Wear comfortable shoes, since St. Mark’s Square is all walking and turning in small spaces. If weather’s rough, the tour may be adjusted or refunded, so plan with flexibility.
In This Review
- Key Takeaways From the Hidden Venice Phone Photo Tour
- Piazza San Marco as a Photo Classroom (Not a Photo Checklist)
- Golden Light at St. Mark’s Square: What You’ll Learn in the 40 Minutes
- Three Photo Tours at Different Times of Day (How to Pick the Right Mood)
- What’s Included With K.Yellow Photography (and What Isn’t)
- Logistics That Make or Break a Photo Tour
- Value Check: Is $144.49 Worth It?
- Practical Tips So Your Phone Photos Look Better Immediately
- Who Should Book This Phone Photo Tour (and Who Might Skip It)
- Should You Book the Hidden Venice Photo Tour With Your Phone?
- FAQ
- How long is the Hidden Venice Photo Tour?
- Where do I meet for the tour?
- Is this tour private?
- What language is the tour offered in?
- Do I need to bring my own camera or lenses?
- What should I wear?
- What happens if weather is poor?
Key Takeaways From the Hidden Venice Phone Photo Tour

- Golden-hour pacing at Piazza San Marco: learn while the square is quiet and light is soft.
- Composition lessons you can copy instantly: use Basilica lines and arcades to frame shots.
- Reflections practice: work with water and the stone look for more dramatic images.
- Exposure and settings coaching for changing light: you’ll learn what to adjust as brightness shifts.
- Private guide attention: you shoot your way, with real guidance as you take each photo.
Piazza San Marco as a Photo Classroom (Not a Photo Checklist)
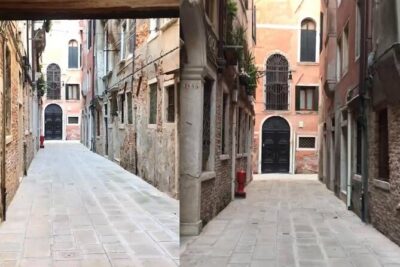
I like that this tour treats photography like a skill, not a scavenger hunt. You’re not just told where to stand. You get taught how to see: where the light lands, how Venice’s shapes pull your eye, and how to turn a simple street-level moment into a scene with a point.
Your guide is a professional photographer, and the tone is described as patient and helpful. That matters because phone photography often breaks down at the worst time—right when the light changes. Here, you’ll practice making adjustments while you’re still there, so you can actually use what you learn on the spot.
Also, the workshop is built around a private experience. That means you’re not competing with strangers for the same angle, and you can move at a pace that lets you re-shoot a scene when you don’t love the result.
The trade-off is simple: this is time-boxed. If you’re hoping to see a long list of Venice neighborhoods, you may feel the hour passes quickly. Think of it as “get your best Venice photos from one powerful location,” not “cover all of Venice.”
You can also read our reviews of more photography tours in Venice


Golden Light at St. Mark’s Square: What You’ll Learn in the 40 Minutes
The session starts at St. Mark’s Square (Piazza San Marco), and the timing is set up for early light. The square is described as more magical and quiet at this hour, which is exactly what you want for photography: fewer people moving through your frame and softer contrast across the stone.
You’ll spend about 40 minutes working on key photo skills in this one place. The goal is not just better pictures. It’s learning the logic behind them, so you can repeat the approach later as you wander.
Here’s how the coaching is designed to work:
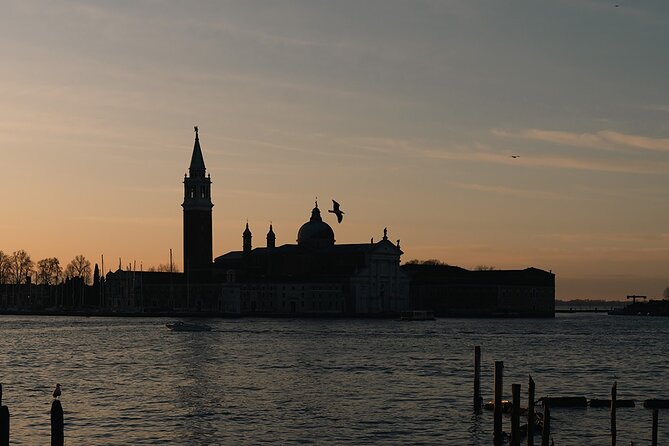
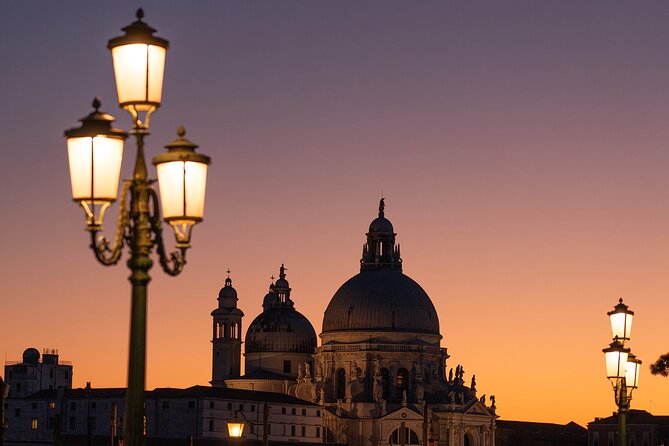
- Capture the first light
Early morning gives you warm tones and long shadows. You’ll learn to use the golden hues and direction of light to make the architecture feel sculpted rather than flat.
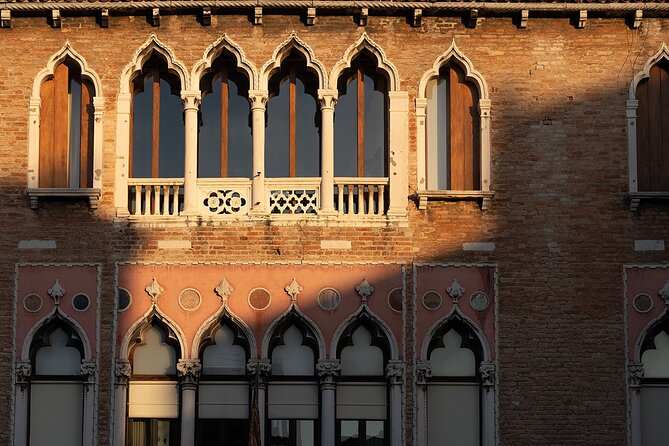
- Focus on composition
Venice is full of strong lines. The guide helps you use the grand Basilica shapes and the elegant arcades as natural frames, so your photos have structure instead of just “a nice view.”
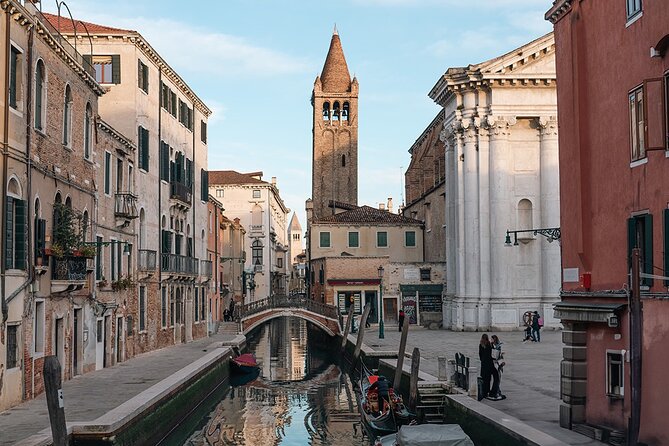
- Experiment with reflections
In the early hours, water reflections can show up on the piazza’s stone. You’ll learn to see these reflective moments as part of the composition, not something you accidentally happen upon.
- Refine your settings
Light changes fast near sunrise. You’ll get guidance on adjusting exposure so you keep detail and depth, rather than letting the phone over-brighten highlights or wash out darker areas.
- Embrace storytelling
This part is about making images that feel like Venice waking up—quiet ripples near the Grand Canal, locals moving about, and that sense of calm before the crush. The guide’s job is to push you beyond postcard framing.
If you’re shooting with a smartphone, you can take that same thinking and apply it right away: pause, tap to set exposure, then reframe using the lines around you. The best results usually come when you slow down enough to notice where your light is coming from.
One more practical plus: the tour notes admission ticket free for the stop. You’re paying for coaching and time, not entry fees just to stand somewhere.
Three Photo Tours at Different Times of Day (How to Pick the Right Mood)
The tour offers three photo tours at different times of day. That’s not a small detail. Timing changes everything: shadows, reflections, crowd levels, and the way your eyes interpret color.
Since the start described is early morning at Piazza San Marco, that option clearly leans toward calm and soft contrast. Early light is often easier to work with because it’s less harsh than midday sun. You’ll get more control over the vibe of your photos because the square is quieter.
What should you consider when choosing among the three?
- If you want minimal crowds and easier lighting, pick the earlier option.
- If you want more dramatic contrast, you might prefer a later time when light is stronger.
- If your priority is getting specific effects like reflections, the time that gives you those conditions is the one to choose.
You don’t need to be a photography nerd to make the choice. Just match it to what kind of Venice you want to remember: serene and golden, or crisp and punchier.
What’s Included With K.Yellow Photography (and What Isn’t)
This experience is offered in English, and you’ll get a full workshop with instruction from a professional photographer. The coaching is described as guidance throughout the session, which is important. A good photo walk teaches you how to make choices, not just where to point your phone.
Included:
- Professional instruction and guidance through the workshop
- A mobile ticket
- The experience is set up as a private activity (your group only)
Not included:
- A camera
- Lenses
Now, here’s the practical interpretation for most people: you’ll use your phone. The tour name is built around that idea, and the whole concept is about teaching phone photography in Venice’s real lighting conditions. If you’re also planning to bring a separate camera or lens, you’re welcome to, but you shouldn’t expect the tour to supply gear.
You’ll meet at St. Mark’s Square and the activity ends back at the meeting point. That makes planning simpler than tours that scatter you across the city.
Logistics That Make or Break a Photo Tour
Location matters more for photos than it does for sightseeing. Piazza San Marco is central, which helps. The tour also lists it as near public transportation, so you’re not stuck with a long final walk through confusing lanes.
You’ll want to come prepared for standing, turning, and shooting from slightly different spots. The tour specifically asks you to wear comfortable shoes. In practice, that’s because you’ll likely shift your position multiple times as the light changes and as you test new framing.
A few additional details that are genuinely helpful:
- Service animals are allowed.
- The experience says most travelers can participate, so it’s not described as extremely demanding.
- You’ll get confirmation at booking, and the ticket is mobile, which reduces last-minute hassle.
And because this is weather-dependent, you should keep your schedule flexible. The experience notes that it requires good weather. If conditions aren’t workable, you’ll be offered another date or a full refund.
If you’re planning to go soon: this one is booked about 11 days in advance on average, which suggests it’s a popular time slot and not something to ignore.


Value Check: Is $144.49 Worth It?
At $144.49 per person, this is not a budget add-on. So the question isn’t whether it costs less than wandering on your own. It’s whether you’re buying skills, timing, and feedback.
Here’s what you’re really paying for:
- A private setting that keeps you from getting lost in a crowd.
- A professional who can spot what you’re doing wrong with your composition and exposure.
- The early-hour timing at Piazza San Marco, when your chance of getting clean shots is much higher.
If you’ve ever taken a bunch of photos in Venice and thought, Why do they all look flat, blurry, or crowded, you know why this matters. The guide’s lessons target the exact causes of “meh” shots: framing, light direction, reflections, and exposure changes.
The short duration is also part of the value equation. In about 1 hour 5 minutes, you’re not trying to learn photography from scratch. You’re getting focused coaching and leaving with a handful of images you actually like, plus a method you can reuse the same day.
The only reason I’d hesitate is if you want a longer route with lots of different stops. This is centered on one location and one main goal: making your San Marco photos stronger by learning how to see the light there.
Practical Tips So Your Phone Photos Look Better Immediately
You’ll get instruction during the tour, but you can set yourself up for success before you meet your guide.
Before you go:
- Make sure you know how to adjust exposure on your phone. Most phones let you tap and sometimes drag on-screen to control brightness.
- Clean your lens. It sounds boring, but sunrise light shows smudges fast.
- Charge your phone fully. If you’re shooting and using the camera constantly, battery drain happens faster than you expect.
During the tour:
- Take a few frames, then stop and re-check your composition. This is where the Basilica lines and arcades coaching helps most.
- Look down for reflections. If the stone looks slightly darker or shinier, that’s often where the reflection is.
- Treat each light change as a prompt to re-shoot. Sunrise shifts minute to minute, and the tour’s whole point is helping you adapt quickly.
After:
- Pick one photo and ask yourself why you like it. Was it the framing? The shadow? The reflection? That’s how you turn the workshop into future results.
Who Should Book This Phone Photo Tour (and Who Might Skip It)
Book it if:
- You want better photos with a phone without carrying extra gear.
- You like early mornings and calmer photo conditions.
- You learn best with real-time feedback, not theory.
- You’re the type who enjoys wandering when someone helps you look with intention.
Skip it if:
- You’re expecting a multi-neighborhood Venice tour. This session is tightly focused around Piazza San Marco.
- You already know exactly how you want to shoot and don’t feel you need coaching. (You might be able to recreate the approach solo, though you’d miss the structured guidance and timing.)
It also fits couples and friends well because it’s private, but it can work solo too if you want a one-on-one teaching vibe.
Should You Book the Hidden Venice Photo Tour With Your Phone?
My take: this is a smart buy for anyone who wants a high-impact Venice photo experience without spending all day on sightseeing logistics. The best part is the way the workshop teaches you to work with light, composition, and reflections in the exact place where those effects show up naturally.
I’d book it if your schedule allows for a good weather window and you’re comfortable with a short session focused on one prime location. If you’re the “I want lots of Venice in one go” type, you may feel limited by the time and single-area focus.
If you do book, choose the tour time that matches your photo mood, wear shoes you can stand in, and arrive ready to adjust as the light changes. That’s when this kind of workshop turns from a nice walk into photos you’ll actually want to keep.
FAQ
How long is the Hidden Venice Photo Tour?
The experience lasts about 1 hour 5 minutes.
Where do I meet for the tour?
You meet at St. Mark’s Square (Piazza San Marco), 30124 Venezia VE, Italy.
Is this tour private?
Yes. It’s a private tour/activity, and only your group participates.
What language is the tour offered in?
The workshop is offered in English.
Do I need to bring my own camera or lenses?
Yes. A camera and lenses are not included. This experience is designed around using your phone.
What should I wear?
Wear comfortable shoes.
What happens if weather is poor?
The experience requires good weather. If it’s canceled due to poor weather, you’ll be offered a different date or a full refund.